Connecting to the VOIP server
You need to use a VoIP (Voice Over IP) client to use your simcard remotely for answering or making calls. This page provides instructions on how to configure a VoIP client on your phone.
We provide you the required settings in your RemoSIM product information email: VoIP Username VoIP Password VoIP SIP Port VoIP Protocol VoIP Server
You need to search for a VoIP client software for your device and configure it to use the above information.
You can always use *43 to make a test echo call on your VoIP client to ensure you have set up everything correctly.
The followings are some clients we have tested.
MacOS
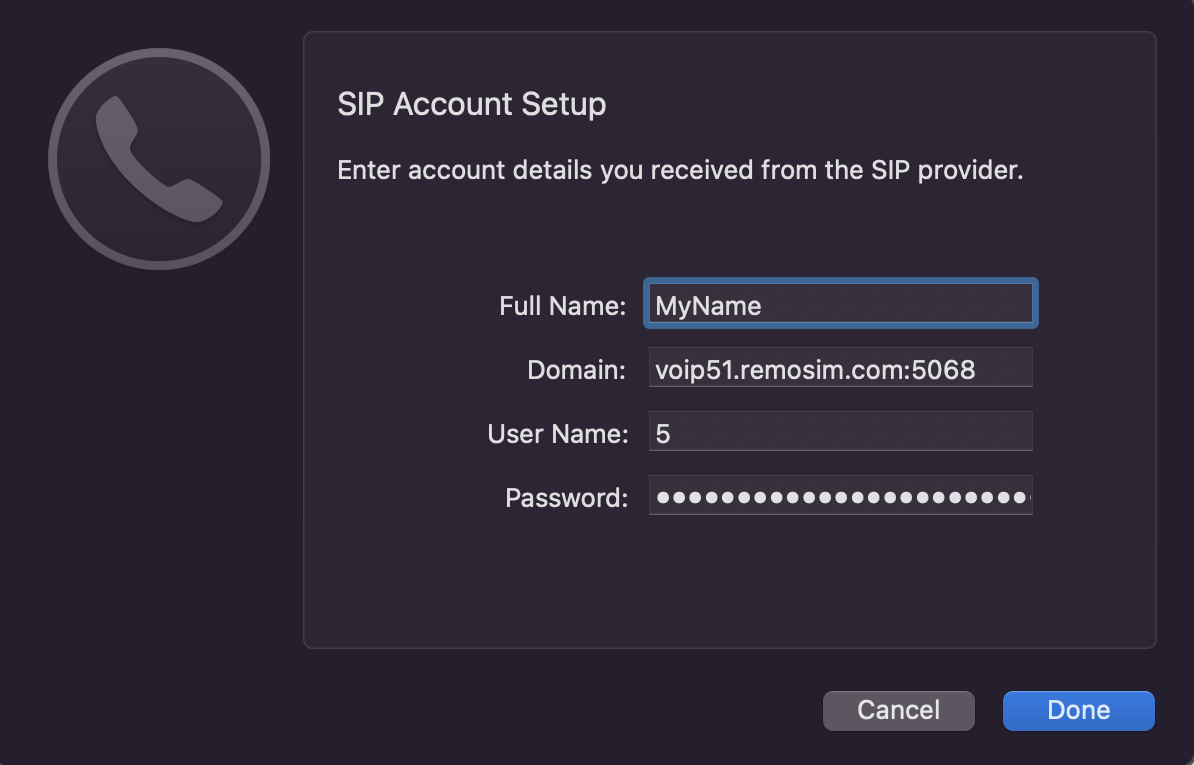
You may install Telephone from App store and configure it as follows to make / receive calls:
To add a new account: Telephone -> Preferences -> Accounts -> “+”
 |
|---|
| Configuration example for Telephone Software |
Full name: Your name Domain: VoipServer:VoipSipPort e.g. john.remosim.com:5068 Username: Voip Username Password: Voip Password
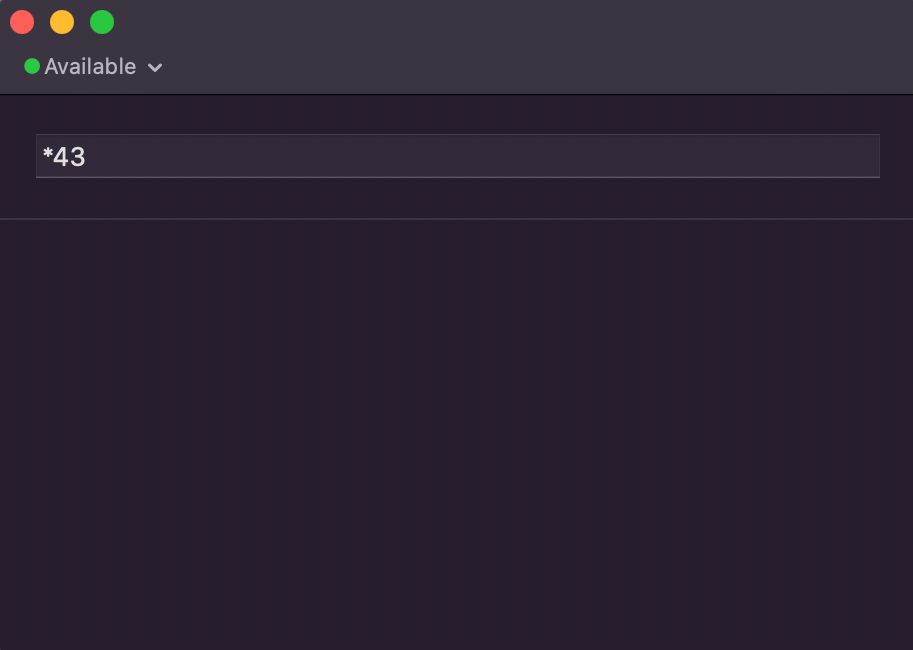
You will see “Available” status in the window if you have entered the correct information. You can use the input box to dial numbers. Dial *43 and press Return for to make an echo test call first:
 |
|---|
| Telephone Software in “Available” mode means that it is connected |
To edit your settings, or add a new voip account, click on Telephone Menu on top left side in MacOS, click on Preferences, choose the Accounts Tab.
Click on “+” to create a new account.
To edit an existing account, you need to uncheck “Use this account”, edit your account, then check “Use this account” to apply.
Android
Android has a built-in voip client. Some phone manufacturers like Samsung has removed this built-in feature though.
Native Android VoIP client
To use the native client, open the Phone app, click on the three dots and enter Settings. Enter Calling accounts section and click on SIP accounts. Click on the + icon to create a new SIP account.
Enter your VoIP Username, VoIP Password and VoIP server.
Click on Optional settings and Update the Port number. Set Send keep-alive to Always send.
Zoiper VoIP client on Android
For Android devices that does not have the built-in VoIP client feature, You may use an application such as Zoiper to connect to the VoIP server.
iPhone
On iPhone, you need to use a VoIP client software such as SessionTalk or Zoiper Lite VOIP soft phone.
Zoiper Lite VOIP soft phone
After installing Zoiper soft phone, enter Settings -> Accounts -> + Do you already have an account = Yes -> Manual Configuration -> SIP account. Then enter the settings from the Account Information E-Mail we have sent you:
VoIP Username VoIP Password VoIP Port VoIP Protocol VoIP Server
Account name: Your_Name Domain: VoIP_Server:VoIP_Port User name: VoIP_Username Password: VOIP_Password
Network Settings -> Enable IPv6: NO (Disable it)
To receive incoming calls, you need to buy a subscription from Zoiper in the Incoming calls section.
SessionTalk for iPhone
You may also use SessionTalk VoIP client on iPhone. After installing SessionTalk, choose Generic SIP and configure it as follows:
Account Name: Your name Display Name: Your name UserName: VoIP_Username Password: VOIP_Password Domain: VoIP_Server:VoIP_Port
Advanced -> IP Version: IPV4 UDP Keepalive: Enabled Miscellaneous -> RTP Port Start: VOIP RTP START RTP Port End: VOIP RTP END
Enabled: Yes
Windows / Linux / Mac
Jitsi Desktop is available for Windows / Linux / MacOS. The installation is straightforward on Windows / MacOS. On Linux: Java v8 (1.8.x) is currently required to run Jitsi client. You need to set this version of java as the default version rather than openjdk-11-jre java that’s installed by default.
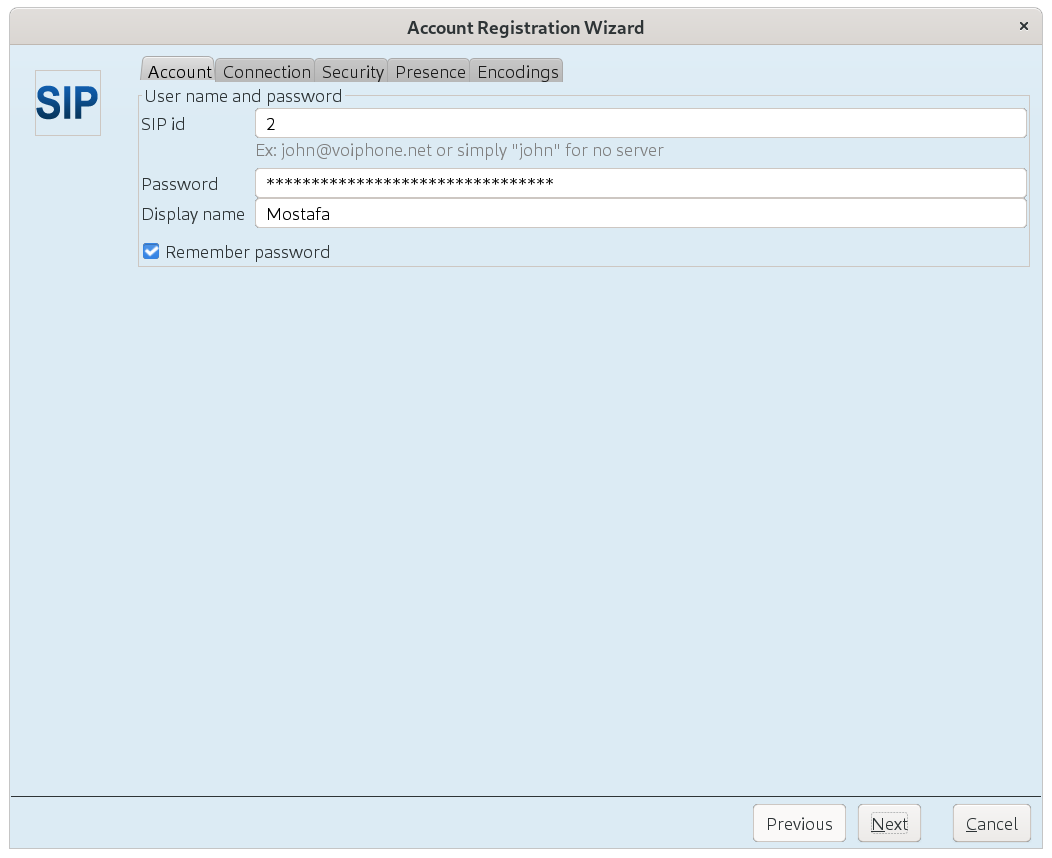
After running Jitsi for the first time, cancel the new account wizard and use File -> Add a new account to add your SIP account as follows.
Network: SIP SIP id: Voip Username Password: Voip Password then click on Advanced: Display name: Your Name
 |
|---|
| SIP settings for JITSI |
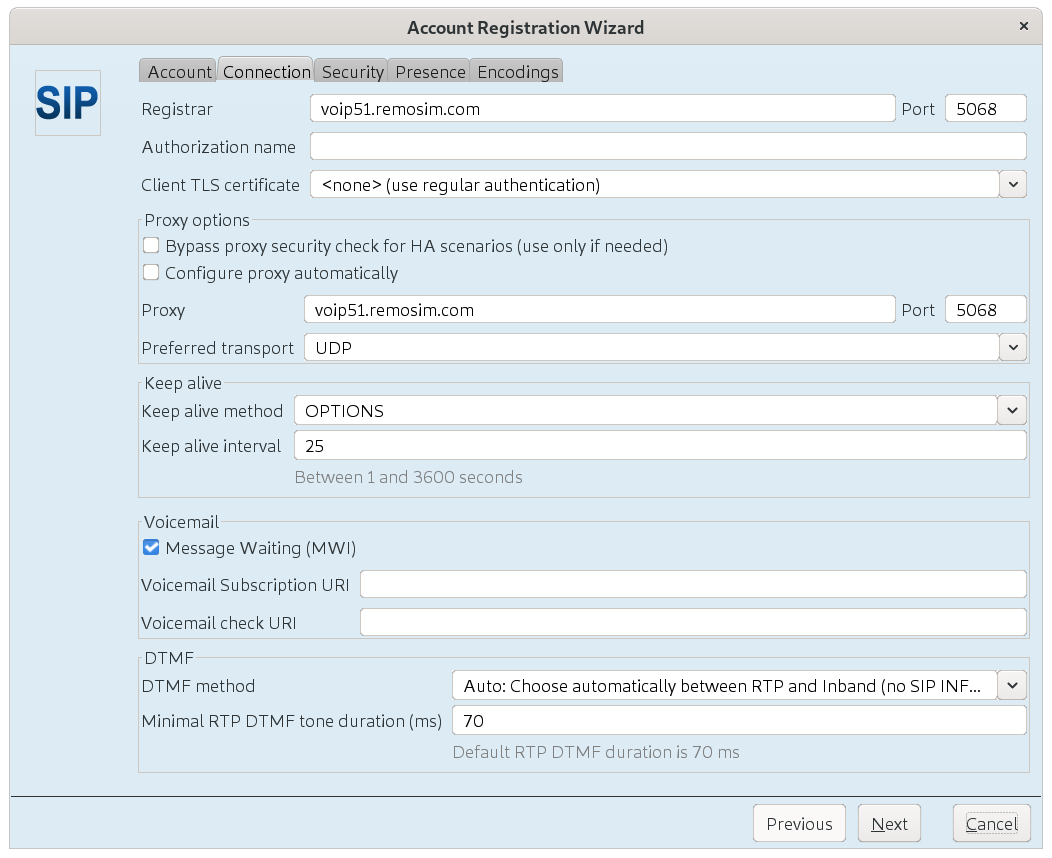
In the connection tab: Registrar: Voip Server Port: VoipSipPort and uncheck “Configure proxy automatically” and enter the same settings for Proxy server and port:
Proxy: Voip Server Port: VoipSipPort Preferred Transport: UDP
 |
|---|
| SIP settings for JITSI |